 Pin It
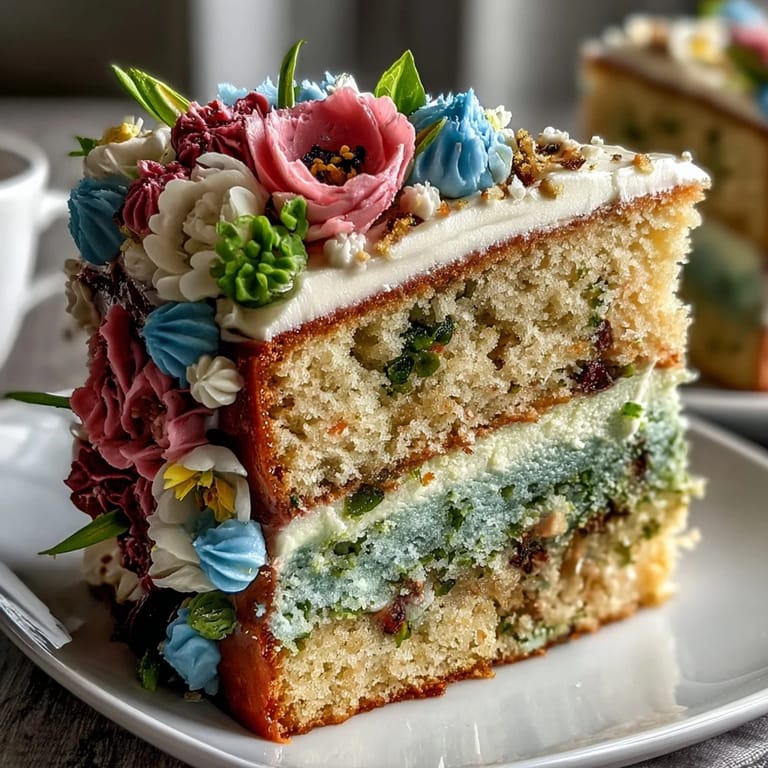
 The first time pastel ombre hues danced through my kitchen, I was humming along to a playlist while prepping for a spring birthday. A gentle breeze carried the scent of vanilla and butter, mingling with laughter from the open window. It wasn’t a grand occasion—just the urge to brighten the last days of April with something pretty. Swirling colors in bowls felt oddly therapeutic, and I ended up painting my fingers pink and yellow by accident. The whole experience was more playful than precise, which set the mood for this cake.
A vivid memory: prepping this ombre cake for a spring book club meeting, the kitchen erupted in a debate about blossom names. My friend Mia spent twenty minutes rearranging flowers on top, determined that pansies deserved front stage. Afterwards, everyone snapped photos, but it was the slices—each carefully colored layer—that got whispers of delight. We laughed about the uneven frosting and agreed perfection was overrated. I learned that sometimes it's the quirks that make for memorable gatherings.
Ingredients
- All-purpose flour: Makes the layers soft yet sturdy, and sifting beforehand keeps everything light.
- Baking powder & baking soda: Guarantees tall, fluffy cake, but measuring them precisely matters or your cake could taste too bitter.
- Salt: Enhances every flavor note—don't skip even a pinch.
- Unsalted butter: Room temperature butter blends beautifully and gives a rich, creamy crumb.
- Granulated sugar: Adds sweetness and structure – beating it well with butter is key for a good rise.
- Eggs: Bring moisture and help bind; make sure they're not cold or the batter won't mix evenly.
- Vanilla extract: Lends warm depth—try a little extra if you love a strong vanilla finish.
- Whole milk: Room temp milk keeps texture consistent; cold can cause uneven mixing.
- Gel food coloring: Offers concentrated color without thinning batter; mix gently for a soft ombre effect.
- Powdered sugar: Sift it to avoid clumps in your buttercream—trust me, it makes spreading easier.
- Edible flowers: Choose organically grown blooms and wash gently; the cake shines when flowers aren't wilted.
Tired of Takeout? 🥡
Get 10 meals you can make faster than delivery arrives. Seriously.
One email. No spam. Unsubscribe anytime.
Instructions
- Prepare the cake pans:
- Grease and line three 8-inch pans, then set aside. The parchment will help the cakes pop out easily after baking.
- Mix the dry ingredients:
- In a bowl, whisk flour, baking powder, baking soda, and salt together. The mix should feel light and uniform in your hands.
- Beat butter and sugar:
- Using an electric mixer, cream the butter and sugar until pale and fluffy (about 3 minutes). Listen for the shift in sound as it thickens.
- Add eggs and vanilla:
- Crack in eggs one by one, mixing well after each, then stir in vanilla extract. The batter will become silkier with each step.
- Combine with milk and dry mix:
- Alternate adding flour mixture and milk, beginning and ending with flour; mix gently until just combined. You'll see the batter become smooth and glossy.
- Color and bake:
- Divide batter into three bowls, tint each pastel shade using gel coloring, and stir gently. Pour into pans; bake 25–30 min until a toothpick comes out clean and cake springs back.
- Cool the layers:
- Let cakes cool in pans for 10 minutes, then turn out onto wire racks. The aroma at this stage is pure spring.
- Make the buttercream:
- Beat butter until creamy, then add powdered sugar gradually, followed by vanilla and milk. Divide and tint frosting for ombre shades; whip until light and billowy.
- Assemble and frost:
- Level cakes if needed, layer with colored buttercream, and apply a crumb coat. Chill 15 minutes, then finish with ombre frosting, blending gently for a smooth fade.
- Add floral topper:
- Arrange edible flowers across the cake top just before serving; cluster and scatter for a natural look.
 Pin It
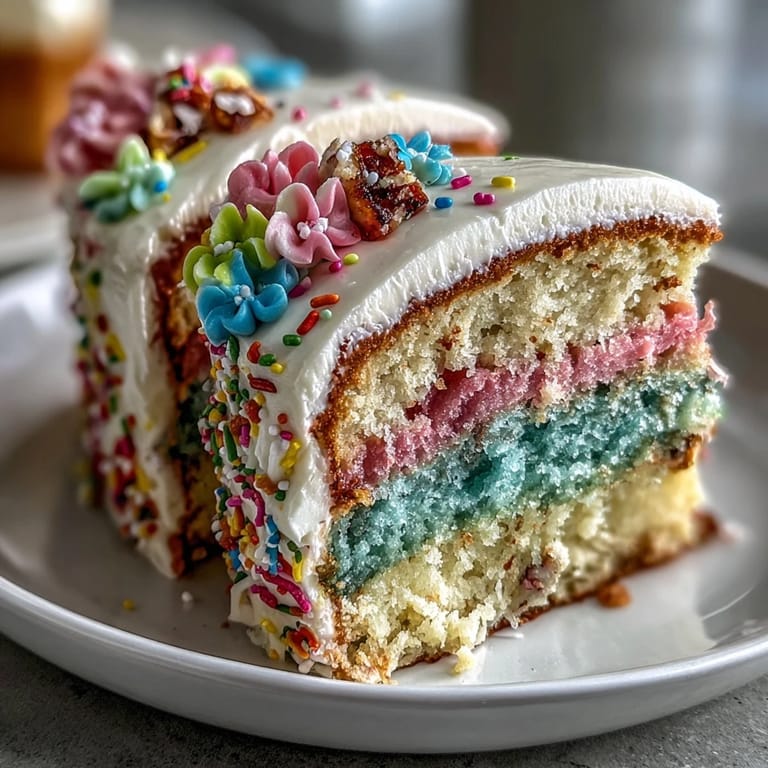
 When my friend Sarah brought her daughter to taste-test, little fingers poked at each pastel layer in awe. The cake was sliced, shared, and instantly declared a "magic rainbow" cake, with crumbs everywhere. That day, I saw how presentation—even imperfect—creates moments that stick. This cake often turns simple afternoons into celebrations, no invitation needed.
Ombre Layering Tricks From My Kitchen
The easiest way to get a gentle ombre is to start with the lightest color and slowly deepen each bowl. If your colors turn out too intense, a spoonful of batter or frosting can lighten them again. I also learned that swirling a bit of color between layers adds a playful touch people notice.
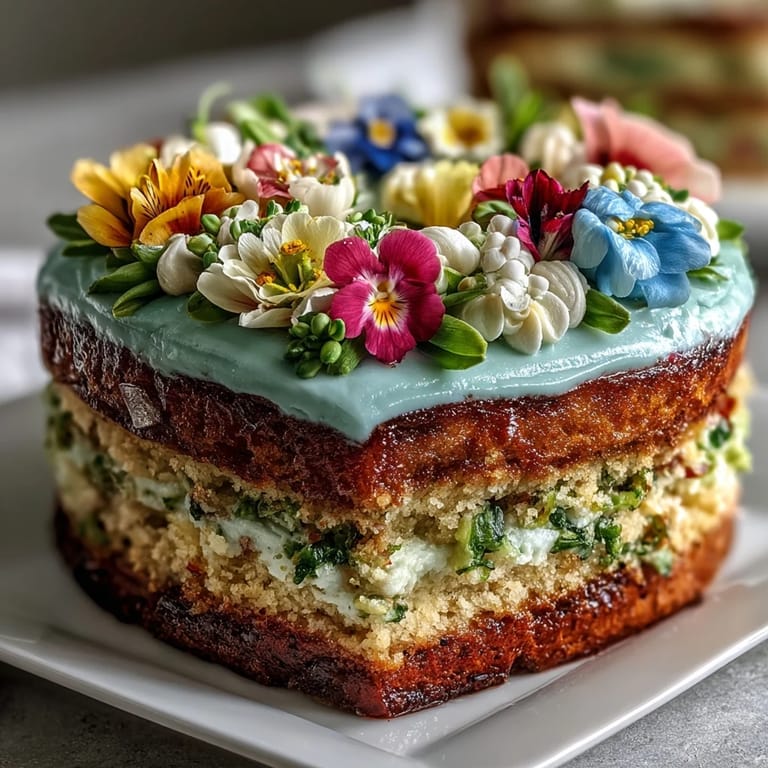
Picking and Placing Edible Flowers
Carefully select flowers that have plump petals and no blemishes; even the smallest wilt shows. Placing blooms in clusters at the cake's center draws eyes and creates texture, but scattering a few loose petals gives a more relaxed vibe. Sometimes, less is more—don't overcrowd.
Make-Ahead and Storage Advice
If you want to bake ahead, wrap cooled layers in plastic and refrigerate overnight, then frost the next day for best results. Buttercream holds up well, so you can make it a day early. Flowers should only garnish the cake at the last moment for a fresh appearance.
- Let cake layers cool completely before you decorate.
- Store leftovers in an airtight box to keep flowers from drying out.
- Serve slices with a gentle touch to preserve ombre edges.
 Pin It
 Whether you're making this for a spring party or just to brighten a slow afternoon, pastel ombre always brings smiles. Try it once, and you'll likely find excuses to bake it again soon.
Recipe FAQs
- → How do you achieve the ombre effect in cake layers?
Divide the batter evenly and tint each portion with different pastel colors using gel food coloring, then layer as you assemble.
- → What type of flowers are suitable for topping?
Choose organic, edible varieties like pansies, violas, roses, or chamomile. Verify they are safe for consumption.
- → Can I make the cake vegan?
Yes. Substitute plant-based butter, milk, and egg replacers for a vegan-friendly version.
- → What tools are essential for preparation?
You'll need 8-inch round cake pans, an electric mixer, mixing bowls, spatulas, a wire rack, and a cake turntable if desired.
- → Are there any allergen concerns?
The cake contains gluten, eggs, and dairy. Edible flowers may trigger allergies in sensitive individuals.
- → How many servings does the cake yield?
This cake provides about 12 servings, making it ideal for medium gatherings.