 Pin It
 Last winter, during that week where it rained for five days straight, I found myself in the kitchen at midnight craving something chocolate. I had bookmarked this recipe months ago but never made it, and suddenly there was no better time than 11 PM on a Tuesday. The smell of melting butter and chocolate filled the whole apartment, and I swear my roommate appeared like magic, asking what was creating that aroma. Those first warm squares disappeared faster than I could count, and rainy night brownies became our new tradition.
My friend Sarah claimed she hated brownies until she tried these at our game night. She took one bite, went completely silent, and then asked for the recipe before even finishing the square. Now she makes them every Sunday for her family, and her kids actually cheer when they smell them baking. Thats the kind of recipe conversion I live for.
Ingredients
- 170 g semi-sweet chocolate: Choose something you enjoy eating plain, since that flavor really shines through
- 115 g unsalted butter: Room temperature butter melts more evenly, but cold works fine if you are patient
- 200 g granulated sugar: Creates that gorgeous crackly top we all love
- 50 g light brown sugar: Adds moisture and a subtle caramel note
- 2 large eggs: Room temperature eggs incorporate better and prevent seized batter
- 1 tsp vanilla extract: Use the good stuff, it makes a difference
- 80 g all-purpose flour: Do not pack it down, spoon it lightly into your measuring cup
- 30 g unsweetened cocoa powder: Sift it first to avoid stubborn lumps
- 1/4 tsp salt: Balances the sweetness and makes chocolate taste more intense
- Optional add-ins: Nuts add crunch, chocolate chips create molten pockets, or both if you are feeling adventurous
Tired of Takeout? 🥡
Get 10 meals you can make faster than delivery arrives. Seriously.
One email. No spam. Unsubscribe anytime.
Instructions
- Prep your pan:
- Lining with parchment paper is not negotiable, ask me how I know scrubbing baked-on chocolate off pans is not fun
- Melt chocolate and butter:
- Low and slow is the way, stir constantly and be patient, rushed chocolate can seize and ruin everything
- Whisk in sugars:
- Let the mixture cool slightly first, otherwise hot chocolate will cook your eggs when you add them
- Add eggs and vanilla:
- One at a time, beating well after each, until the mixture looks glossy and smooth
- Fold in dry ingredients:
- Gently is the key word, overmixing develops gluten and makes brownies cakey instead of fudgy
- Add extras if using:
- Fold in nuts or chocolate chips just until distributed, no more than a few strokes
- Spread and bake:
- The batter will be thick, use an offset spatula or the back of a spoon to even it out
- Watch for doneness:
- Start checking at 22 minutes, you want moist crumbs on your toothpick, not a clean skewer
- Cool completely:
- This is the hardest part, but cutting warm brownies makes a mess and they need time to set properly
 Pin It
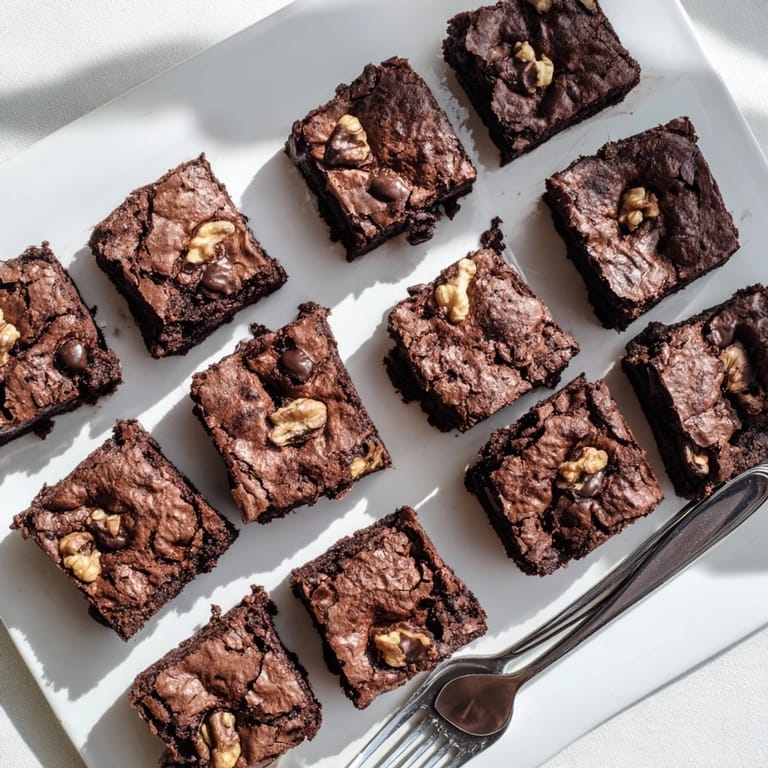
 My dad, who claims he does not have much of a sweet tooth, ate three of these when I brought them home for Thanksgiving. He kept saying he was just testing them to make sure they were safe for everyone else. By the third square, he stopped making excuses and just accepted his new reality as a brownie person.
Getting That Crackly Top
The sugar dissolving into the hot butter creates that signature paper-thin crackly layer as it bakes. Make sure your butter and chocolate mixture is hot enough to dissolve the sugar completely when you whisk it in. I once rushed this step and ended up with a smooth but disappointing top, lesson learned.
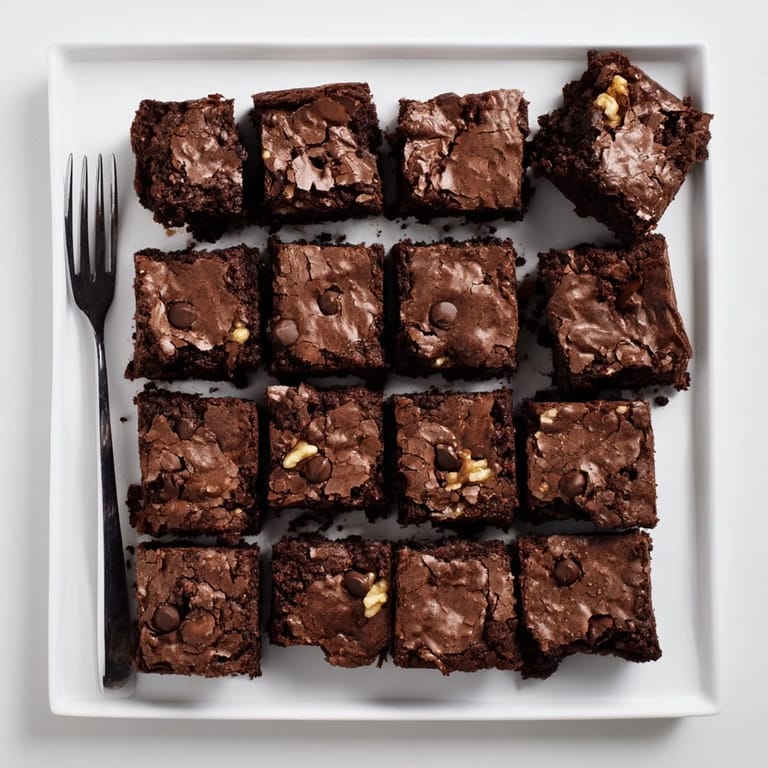
Fudgy Versus Cakey
The flour ratio here deliberately lands on the fudgy side of the spectrum, and every gram matters. Too much flour transforms these into cake, which is lovely but not what we are after. When measuring your flour, do not tap the cup or press it down.
Make-Ahead Magic
These brownies actually taste better on day two, as the flavors deepen and the texture settles. I bake a batch on Sunday and they are perfect for lunchboxes all week long, assuming they last that long. Wrap them tightly in plastic once completely cooled.
- Freeze wrapped squares for up to three months and thaw at room temperature
- Warm individual pieces for 15 seconds in the microwave for that fresh-baked experience
- Store at room temperature in an airtight container for up to five days
 Pin It
 Life is too short for mediocre brownies, and these are far from mediocre. Grab a glass of cold milk and enjoy every bite.
Recipe FAQs
- → How do I achieve the crackly top?
The crackly top forms from proper sugar dissolution during the melting stage and the right baking temperature. Make sure sugars are fully combined with the warm chocolate mixture before adding eggs.
- → Why should I underbake slightly?
Removing from the oven when a toothpick shows moist crumbs rather than clean ensures the centers stay fudgy and dense. The carryover heat completes cooking without drying out the texture.
- → Can I make these gluten-free?
Substitute the all-purpose flour with a 1:1 gluten-free flour blend containing xanthan gum. The texture remains remarkably similar to the original version.
- → How should I store them?
Keep in an airtight container at room temperature for up to 3 days. For longer storage, refrigerate for up to a week or freeze individually wrapped squares for up to 3 months.
- → What chocolate works best?
Semi-sweet chocolate with 60-65% cocoa content delivers balanced sweetness and intensity. Higher percentages produce less sweet results, while milk chocolate creates a softer texture.