 Pin It
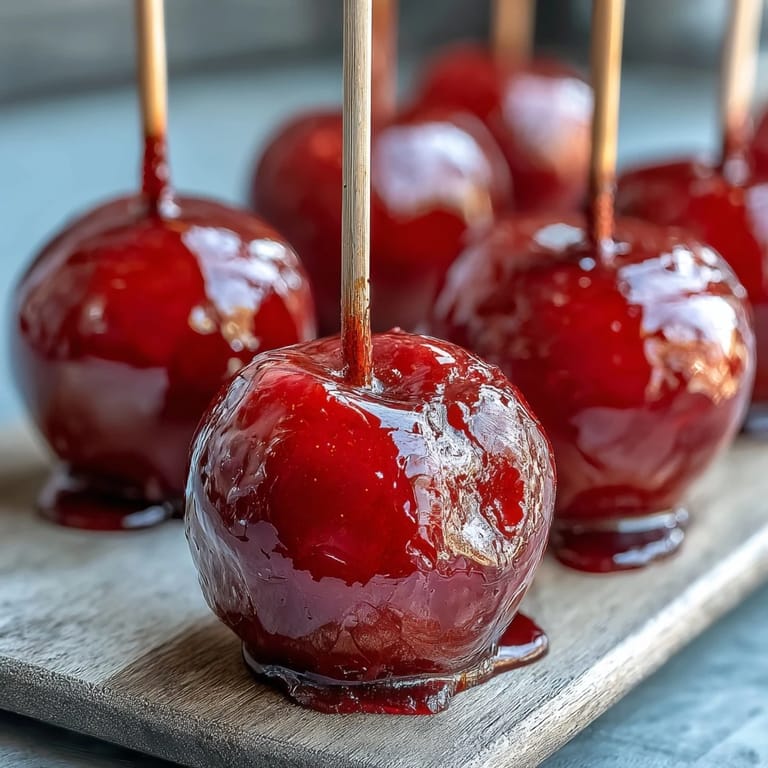
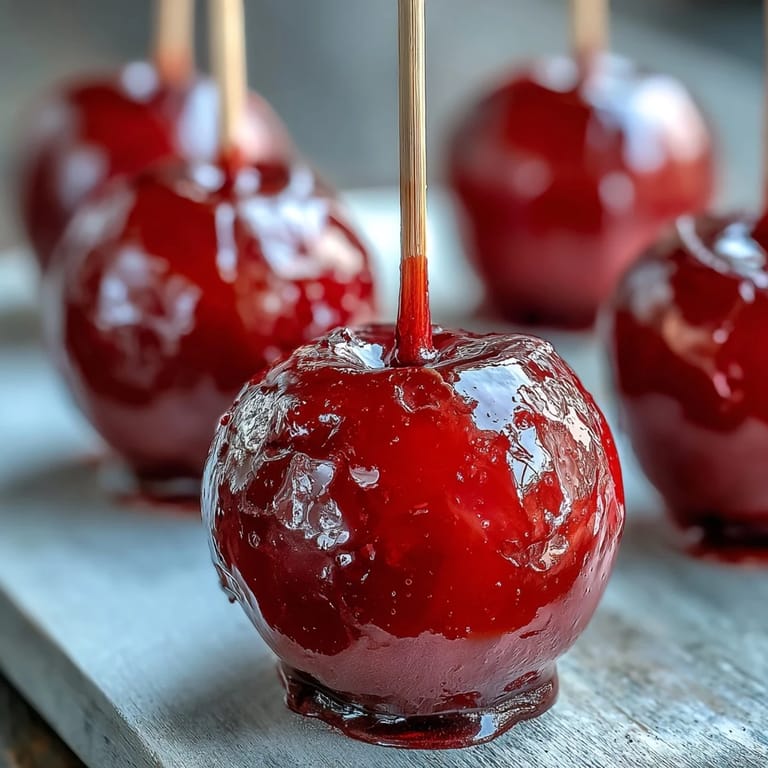
 My niece's eyes went wide the moment she bit into one of these—that sharp crack of the candy shell followed by the tartness of the apple underneath. I'd made them the night before her birthday party, standing in my kitchen at midnight with a candy thermometer in one hand and a wooden stick in the other, feeling like I was dipping tiny edible jewels. The whole kitchen smelled like caramelized sugar and anticipation, and honestly, I was just as excited as she would be the next day.
There was this one afternoon when my neighbor stopped by just as I was pulling a batch of these from my cooling sheet, and she asked if she could buy some for her daughter's school fundraiser. I ended up making three dozen that weekend, and it became this whole thing—suddenly parents were texting asking for orders. It was silly, but it made me realize how much joy something so simple could bring to people.
Ingredients
- Small apples (Gala, Fuji, or crabapples): Choose fruit that's firm and unblemished; small varieties work best since they're easier to coat evenly and more fun to eat.
- Granulated sugar: This is your base, and measuring it precisely matters—too little and the coating won't harden properly.
- Light corn syrup: This prevents crystallization and gives you that glossy, smooth finish instead of a grainy texture.
- Water: Tap water is fine; it just helps dissolve the sugar at the start.
- Red gel food coloring: Gel colors work better than liquid ones because they won't thin out your candy mixture, and they give a more vibrant hue.
- Wooden sticks: Make sure they're food-safe lollipop or popsicle sticks, not craft sticks.
- Nonstick cooking spray or parchment paper: This prevents sticking and makes cleanup so much easier.
Tired of Takeout? 🥡
Get 10 meals you can make faster than delivery arrives. Seriously.
One email. No spam. Unsubscribe anytime.
Instructions
- Prep your apples:
- Wash them thoroughly under running water and dry completely—any moisture will cause the candy to slide right off. If you're using full-sized apples, halve them and use a melon baller to remove the seeds and create a sturdy base for the stick.
- Set up your workspace:
- Line a baking sheet with parchment paper and either grease it lightly or use a silicone mat with nonstick spray. Organization here saves you from panicking when hot candy is involved.
- Build your candy base:
- Combine the sugar, corn syrup, and water in a medium saucepan, stirring over medium heat until the sugar completely dissolves—you'll know it's ready when the mixture looks clear rather than grainy. Don't skip this step or you'll end up with a gritty coating.
- Reach the magic temperature:
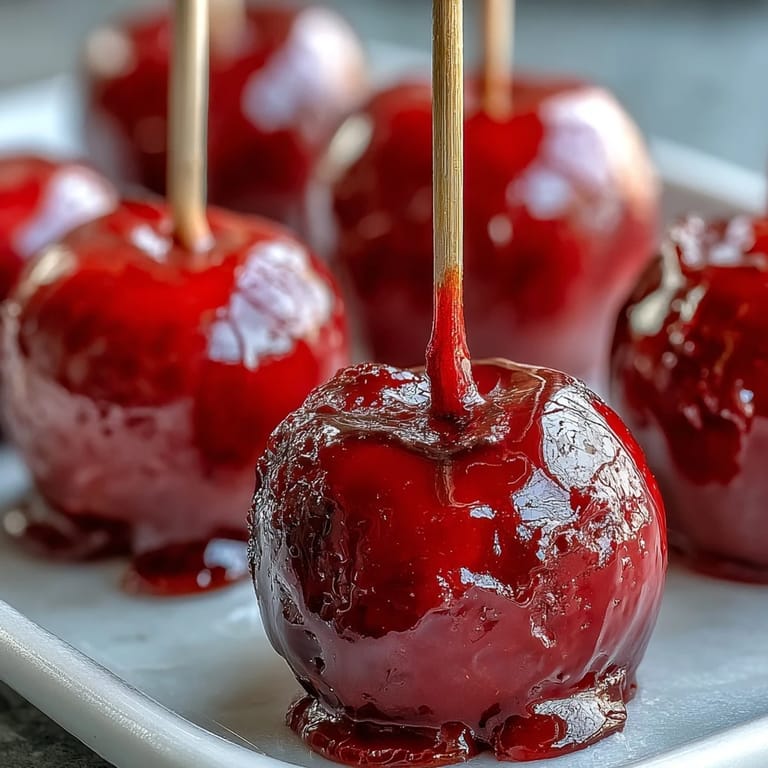
- Increase the heat to high and bring everything to a boil without stirring (this is crucial—stirring can cause crystallization). Insert your candy thermometer and watch it climb until it hits 290°F, which should take about 8 to 10 minutes. You're aiming for the hard crack stage, that perfect point where the candy will shatter satisfyingly.
- Add your color:
- Remove the pan from heat and carefully stir in your red gel coloring until it's evenly distributed throughout. The mixture will look glossy and dangerous at this point, which is exactly right.
- The dipping moment:
- Work quickly but carefully here—dip each apple into the hot coating by twirling it and letting the candy coat evenly, then hold it above the pan for a few seconds to let excess drip off. Place it on your prepared sheet and resist the urge to touch it immediately.
- Let it set:
- Give the apples about 10 minutes to cool completely at room temperature until that candy shell hardens into something you can actually bite through. Room temperature is key—no shortcuts or tricks here.
 Pin It
 I remember my mom watching me make these and commenting that they looked like little jeweled apples from a fairy tale. That comment stuck with me because she was right—there's something almost magical about turning something as ordinary as an apple into something that looks like candy jewelry. It changed how I think about food presentation, honestly.
Decorating Your Apples
The candy coating is a blank canvas if you want it to be, and the window for customization is brief but exciting. Right after you dip an apple and before the candy hardens, you can roll it in sprinkles, crushed cookies, mini chocolate chips, or even edible glitter. I learned this by accident when my daughter spilled some rainbow sprinkles onto my cooling sheet, and suddenly the apples looked even more festive.
Flavor Experiments
Once you've nailed the basic red version, try switching up the food coloring for green, blue, or even purple. I've also played around with adding a tiny pinch of vanilla extract or almond extract to the candy mixture right after removing it from heat, just enough to add a whisper of flavor without compromising the texture. The possibilities expand once you understand how the candy behaves.
Storage and Serving
Keep these at room temperature in a cool, dry place, ideally in a single layer so they don't stick to each other. They'll stay crispy and perfect for several days, though in my experience they're usually gone within hours anyway. For parties, arrange them on a tiered stand or in a vase filled with decorative tissue paper—they're almost too pretty to eat.
- Never refrigerate these, as condensation will make the candy shell sticky and disappointing.
- If you make them more than a few hours ahead, store them in an airtight container with parchment between layers.
- Keep the candy thermometer handy for your next batch—you'll definitely be making more.
 Pin It
 These candy apples turned into my go-to gift and party contribution, the kind of thing people ask for by name. There's something special about handing someone a treat that took barely 30 minutes but feels like you've given them something thoughtful.
Recipe FAQs
- → What type of apples work best for these treats?
Small apples like Gala, Fuji, or crabapples are ideal as they fit well on sticks and cook evenly.
- → How do you achieve the crunchy candy coating?
Heating sugar, corn syrup, and water to the hard crack stage (290°F/143°C) creates the hard, crunchy shell when cooled.
- → Can the candy coating color be changed?
Yes, red gel food coloring can be replaced with green, blue, or other colors for variety.
- → How can I prevent the candy apples from sticking to the surface?
Line the baking sheet with parchment paper or a silicone mat and lightly grease or spray with nonstick spray.
- → Are there any safety tips for working with the hot syrup?
Use caution as the syrup is extremely hot; adult supervision is recommended when children are involved.
- → What are some fun topping ideas to use before the coating hardens?
Sprinkles, crushed cookies, or mini chocolate chips add texture and extra flavor when sprinkled on freshly coated apples.